30 March 2012

Monster Cookies


When someone would ask me what my favorite cookie was I would typically answer "Chocolate Chip". Because that's the obvious answer, right?  But really I like Chocolate Chip M&M cookies even more.  And I do enjoy Oatmeal Chocolate Chip cookies, too.  Maybe even Oatmeal Chocolate Chip M&M?  Is that getting too specific?
 
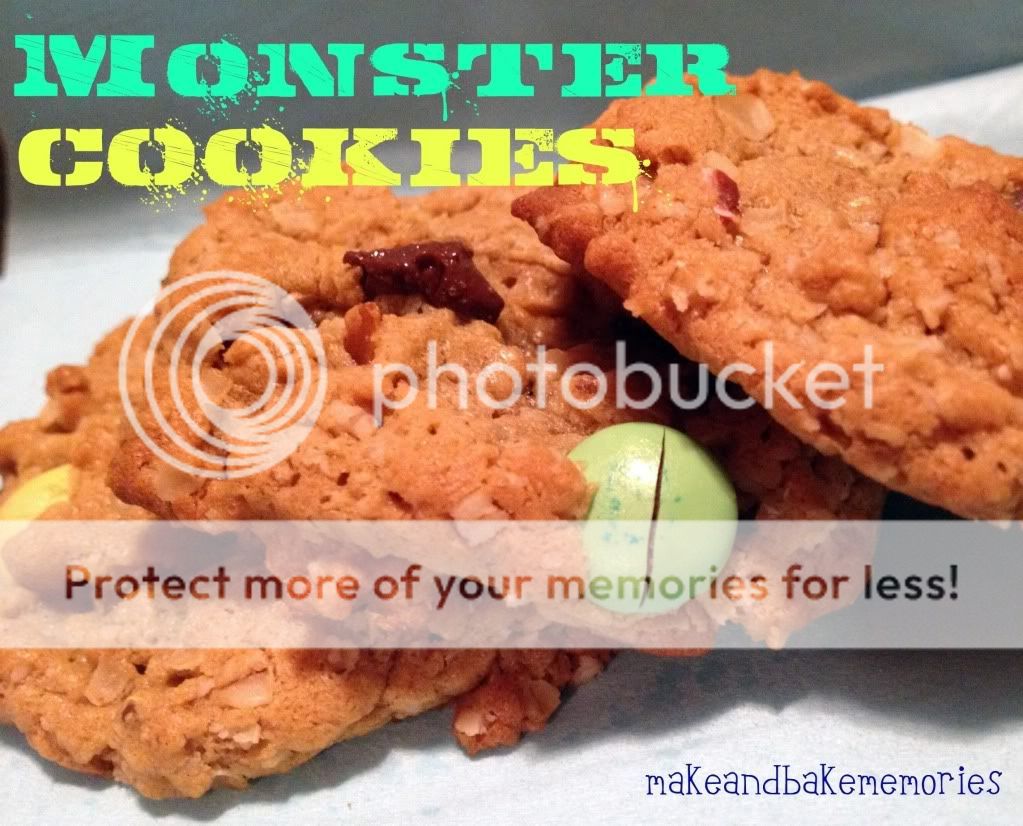
My point here is that I never realized until this week that really my favorite cookie is a MONSTER cookie.  I've had them many times before, but I have never MADE them.  I found a recipe and read through the ingredients and quickly realized WHY these would become my new favorite cookie.  Not only do they have chocolate chips, but they have M&Ms, oatmeal and LOTS peanut butter!
 
My favorite thing to do is make up a bunch of cookies and put them in the freezer for an occasional snack or dessert as needed (ok, more like if they are left out on the counter I will eat them all in one evening, easily!).  But I do love being able to throw the frozen cookies in my lunch bag and have them perfectly thawed by noon!
 
Here's the recipe for these yummy cookies!  I made the cookies small and it probably made 6-8 dozen!  Enjoy!

28 March 2012

A Busy Week!

My apologies for the break in blog posts.  The last week has been busy!  For starters, our water heater decided to go out last Tuesday evening.  Wouldn't have been a huge deal, but Mike was scheduled to go out of town the following afternoon.  Thankfully my Dad saved the day and got us a new water heater installed by Thursday afternoon.  (I only had to take two cold showers, which is not something I ever want to do again!)

There it is!  Our new water heater. 
Maybe not so exciting to you, but let me tell you this was the highlight of my day last Thursday! :)

 Wednesday through Saturday it was just me and the kids.  This was my first big span of time alone with both of em – getting them off to day care and me to work, fixing meals, giving baths, putting to bed, etc.  I was a little nervous for all of it since Mike is a HUGE help, but both kids were SO good while their daddy was gone and we had a lot of fun just the three of us!


Mike came home on Saturday and the kids and I decided to surprise him at the airport.  We got there just as the plane was landing and Mariah thought it was SO neat!  She was beyond excited to see her daddy!

Well the busy-ness didn't stop once Mike was home.  On Monday evening we had a photoshoot with Jennifer Jayne Photography.  Since Madden just turned 3 months and Mariah is almost 2 I thought it would be perfect timing to capture those milestones and get some precious sibling photos.  I got the kids adorable outfits from Childrens Place (which will double as their Easter outfits!).  They were all decked out and ready to go.  Once we got there, however, Mariah had no intentions of being in any pictures.  She would much rather pull props off the shelves, play with toys and ignore anything we said.  Needless to say, it turned into a giant photoshoot of our little guy!  All we could do was laugh!  Oh toddlers - you sure cant make them do anything they don't want to do! J

I also blame my lack of blogging on the fact that the weather has been so nice lately. We've made a LOT of trips to the park.  We are lucky to have one just a couple blocks away… but the down side is that Mariah can see it out our back door so she wants to go every chance she can!  With Mariah's birthday in just a couple weeks (how is she going to be 2 already?!) we are considering getting a swingset for our backyard – just a small one, but something she can play on while dinner is in the oven or while Madden is taking a nap.


I can't believe March is almost over, but I'm not complaining because April is definitely my favorite month of the year!  Between Easter, my birthday and Mariah's birthday we have a lot of fun things coming up! J


19 March 2012

Philly Cheesesteak Pizza


After Madden's baptism party we had some leftover roast beef.  I racked my brain for any way I could incorporate this roast beef into a dinner… something beyond lunch meat and cheese on a bun.  Then I had an idea… a pizza!
 
Using a pillsbury refridgerated pizza dough, I rolled it out and brushed it with canola oil. 


Then I cut the roast beef up into small pieces and scattered on top of dough.  Next I chopped a red onion and a green pepper and scattered that around the roast beef. 


Lastly I grated some swiss cheese and sprinkled generously (except the small corner we kept allergy free for Mariah :)


Popped in the oven for 15 minutes at 425*


Let me tell you… this was seriously the best pizza I've ever had!  Mike and I ate this up quicker than you could imagine.  We decided that it tastes like a Philly Cheesesteak in pizza form… even if it doesn’t really have all the normal cheesesteak ingredients! 
 
So next time you have some lunch meat to use up… TRY THIS.  Actually, I'm going to buy lunch meat specifically to make this AGAIN! J 

17 March 2012

Comparing Pictures

I thought I would share a few comparison pictures for fun! :)

Both pictures were at 38 weeks - weird that I appear bigger with Madden since he was 1/2 pound smaller!  It's always crazy looking at pregnancy pictures... how was it possible to be that big?!

Madden's 3D ultrasound picture compared to his 1 day old picture!
Technology is incredible!

Pictures of Mariah and Madden just home from the hospital in the swing :)

I think these pictures show their personalities already.
Mariah is outgoing and strong-willed whereas Madden is more laid-back and serious :)


15 March 2012

Mint Chocolate Delights


Just after Christmas I was doing some shopping at Target (while Mike graciously sat in the parking lot with the two kiddos – Madden sound asleep in typical newborn fashion and Mariah happily watching Elmo on the headrest DVD player.  Oh and Mike got to listen to sports on the radio… so really we were all happy!)  Anyways...on one of the sale endcaps at Target they had some bags of these Dark Chocolate and Mint chips.  I love mint and chocolate, so I grabbed one knowing it would be a part of a yummy treat down the road.


The bag sat in my pantry for a while (don't worry, they didn't expire until November 2012) and I kept looking at it and saying "I need to use those sometime soon".  Well last night we were in desperate need of a treat after dinner.  Opening the pantry for inspiration I again spotted the bag and knew today was the day.  Unsure of how I would incorporate them into a recipe I turned over the bag and saw the recipe for "Mint Chocolate Delights".  Um…YUM!

Luckily I had all the ingredients in stock so I got to work.


Dropping the dough using my small cookie scoop onto my NEW Pampered Chef metal cookie sheet (which I am in LOVE with) and bake.


Dare I say it’s a SOFT version of a thin mint cookie! :)


Mint Chocolate Delights
Nestle

2 cups all purpose flour
2/3 cup baking cocoa
1 tsp baking soda
1/2 tsp salt
1 cup (2 sticks) butter, softened
2/3 cup sugar
2/3 cup packed brown sugar
1 tsp vanilla extract
2 large eggs
10 oz. package Nestle Dark Chocolate & Mint morsels

Preheat oven to 325* F.
Combine flour, cocoa, baking soda, and salt in small bowl.  Beat butter, granulated sugar, brown sugar and vanilla extract in large mixer bowl until creamy.  Add eggs, one at a time, beating well after each addition.  Gradually beat in flour mixture.  Stir in morsels.  Drop by well-rounded tablespoon onto ungreased baking sheet.
Bake 11 to 13 minutes or until cookies are puffed and centers are set.

Makes 4 dozen cookies.


13 March 2012

Vanilla Vanilla Cupcakes with Buttercream Frosting


Box cake mixes are two things that I love - QUICK and EASY. Honestly, I didn't even know until about a year ago that you could make cake any other way (kind of kidding... but kind of serious, too!). Although cake from a box is plenty tasty... it just doesn't compare to made from scratch!

For Madden's baptism I decided to make these Vanilla Vanilla Cupcakes. I actually came across the recipe on Pinterest and thought they sounded easy enough!


Billy's Vanilla, Vanilla Cupcakes

1 3/4 cups cake flour
1 1/4 cups unbleached all-purpose flour
2 cups sugar
1 tablespoon baking powder
3/4 teaspoon salt
1 cup (2 sticks) unsalted butter at room temperature, cut into 1-inch cubes
4 large eggs
1 cup milk
1 teaspoon pure vanilla extract

1. Preheat oven to 325. Line cupcake pans with paper liners; set aside. In the bowl of an electric mixer fitted with the paddle attachment, combine flours, sugar, baking powder, and salt; mix on low speed until combined. Add butter, mixing until just coated with flour.

2. In a large glass measuring cup, whisk together eggs, milk, and vanilla. With mixer on medium speed, add wet ingredients in 3 parts, scraping down sides of bowl before each addition; beat until ingredients are incorporated but do not overbeat.

3. Divide batter evenly among liners, filling about two-thirds full. Bake, rotating pan halfway through, until a cake tester inserted in the center comes out clean, 20-25 minutes.

4. Transfer to a wire rack to cool completely. Repeat process with remaining batter.


Billy's Vanilla Buttercream

1 cup (2 sticks) unsalted butter, room temperature
6 to 8 cups confectioners' sugar
1/2 cup milk
1 teaspoon pure vanilla extract

1. In the bowl of an electric mixer fitted with the paddle attachment, cream butter until smooth and creamy, 2 to 3 minutes. With mixer on low speed, add 6 cups sugar, milk, and vanilla; mix until light and fluffy. If necessary, gradually add remaining 2 cups sugar to reach desired consistency.


The cupcakes were very yummy - especially the frosting! If I try this recipe again I might even fill the middle with the buttercream frosting! :) I also made white chocolate cross with a mold so the cupcakes looked appropriate for a baptism.

11 March 2012

Madden's Baptism

Happy Baptism Day to our precious baby boy, Madden Kenneth.

We were so grateful to have so many friends and family members there to celebrate this special sacrament!

Madden in his cute little suit :)

Madden being baptized


Madden's wonderful godparents - Uncle Evan and Aunt Lori!


After the baptism we gathered for some yummy food including these allergy-free cookies


And homemade vanilla cupcakes! (I will post these recipes soon!)


Mariah had blast celebrating "Manny's Special Day"!
(She had SO much fun that she never even got a nap in! :)


And we had one exhausted little guy!

08 March 2012

Happy Birthday, Mom!

Today is my mom's birthday! She invited us over for dinner (even though I told her she should NOT be cooking on her birthday, but she insisted!). We had a delicious meal - chicken, couscous and salad. Mariah and Madden brought the dessert...

a cookie bouquet from Cookies by Design! YUM!


Happy Birthday Mom!

Or as Mariah would say "Grammie - Happy Day!"


06 March 2012

Easiest Peanut Butter Cookies Ever!

If you haven't caught on yet.... I enjoy doing things that are QUICK and EASY! I also enjoy baking with "common" ingredients (i.e. things I can pronounce and find easily in a grocery store).

I came across this Peanut Butter Cookie recipe on Pinterest.


Ingredients:
1 cup peanut butter (smooth or chunky, whichever you prefer!)
1 cup sugar
1 egg

That's IT! 3 ingredients! I couldn't believe it... and I thought the only way to know if this was a joke or not was to try them.

I mixed up the dough in about 2 minutes, plopped on my baking stone (making the pretty crisscross with a fork, because otherwise it's just not a peanut butter cookie!). Baked at 350 for 10-12 minutes and voila! Perfect and yummy peanut butter cookies!

Now if I'm ever caught in a bind and need a last minute dessert you bet I will be going to this recipe.

04 March 2012

DIY Bow Organizer

Anyone with a little girl knows that hair bows are essential! In every color, shape and size so you can have the perfect one for any outfit at a moments notice!

Mariah's bow collection grew and grew until we finally maxed out our old hair bow organizer. It was time for something new and something that would hold a LOT of bows. I came across a neat tutorial on pinterest (where else!?!) and thought I would give it a try.

Supplies needed:
  • Frame (any size/shape - obviously a bigger frame will hold more bows!)
  • Cardboard the size of the frame
  • Fabric
  • Ribbon
  • Masking tape or hot glue gun
  • Pins
I found all of the supplies around our house and got to work!

Cut cardboard to size of frame and cut fabric with 1 inch allowance on each side.

Secure fabric on back using masking tape (or hot glue, as the tutorial suggests). Cut ribbon with at least 1-2 inch allowance on each side and secure to the back using the same method as you did the fabric. I also used pins about half way across each ribbon in the front to ensure it didn't sag when we filled it with bows.

Place in the frame.

Then, hang up on the wall!

Perfect place for all of Mariah's bows... and plenty of room to grow! :)

03 March 2012

homemade playdough!


Mariah enjoys waking up before 6am on weekends. So we started our day bright and early. What fun activity could we do??? Then I remembered the homemade playdough recipe I had pinned on pinterest the day before!

I gathered the ingredients (luckily we had everything in our pantry!) and we got started!


The directions say it takes about 10 minutes. Pretty sure we were done with it in about 5 minutes! It was super quick and easy!

We made green playdough in honor of upcoming St. Patrick's Day, of course!

Mariah loves playing with it! We even rolled it flat and cut out butterfly shapes!